Configure Outlook.com to retrieve your emails
Now that you have signed up for a Microsoft Account with your existing email address, you can configure Outlook.com to collect your mail from your current mail account.
- Go to the Outlook.com webpage and sign in with the email address and password you have specified when setting up your Microsoft Account if you are not automatically signed in already.
- Click on the “Continue to inbox” button when you get a “Welcome to your new Outlook.com inbox”. You’ll find this and additional information also in an email that has been placed in your Inbox from the Outlook Team.
- In the top right corner but on the left of your name, you’ll see a gear icon. Click on it and from the menu that pops up choose: Options.
Click on the image to enlarge.
- Under “Managing your account” click on: Your email accounts
- It the “Add an email account” section, click on the button: Add a send-and-receive account
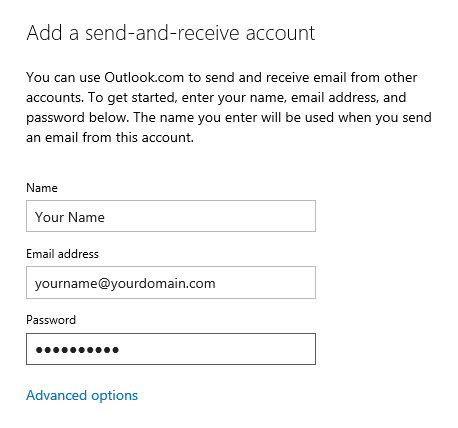
- On the “Add a send-and-receive account” page, you’ll find that your current email address has already been filled out. For most POP3 accounts, you only need to fill out the password for your account (so not your Microsoft Account password) to complete the configuration. If the AutoConfiguration of your account doesn’t work, click on the “Advanced options” link to specify the correct server details for your POP3 account and SMTP server. You’ll also be automatically transferred to this page when the AutoConfiguration fails.
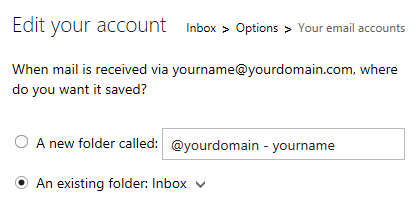
- Once successfully configured, Outlook.com will prompt you what to do with emails retrieved from your current address. By default it wants it to place it into a separate folder but since this is the first and main email account you should select “An existing folder: Inbox” instead.
- Save your settings.
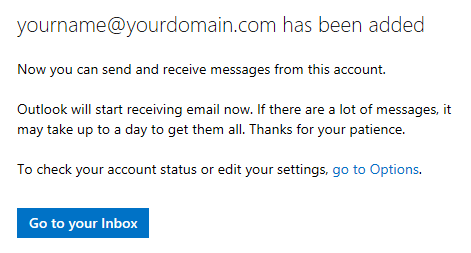
- You’ll now get a confirmation message that your messages are being collected and with the option to return to your Inbox or to verify your account status. Choose to go back to your Inbox folder to see your messages which are still in the Inbox folder of your POP3 account being collected. The mail collecting is being done in increments so if you have a lot of email still on your POP3 account, this could take a while.
Tip! By default, your messages will also remain on the POP3 server of your email provider. If you are happy with the results and/or you have only limited space on the POP3 server, you can configure the account aggregation settings to remove the messages from the mail server once they are collected by Outlook.com. To do this, go to your account settings as indicated in step 4 and click on the “Details” link next to your configured account and then on the “Edit” link in the pop-up dialog. In the “Incoming (POP3) server information” section, you’ll find an option for “Leave a copy of messages on the server”.


